
Introduction
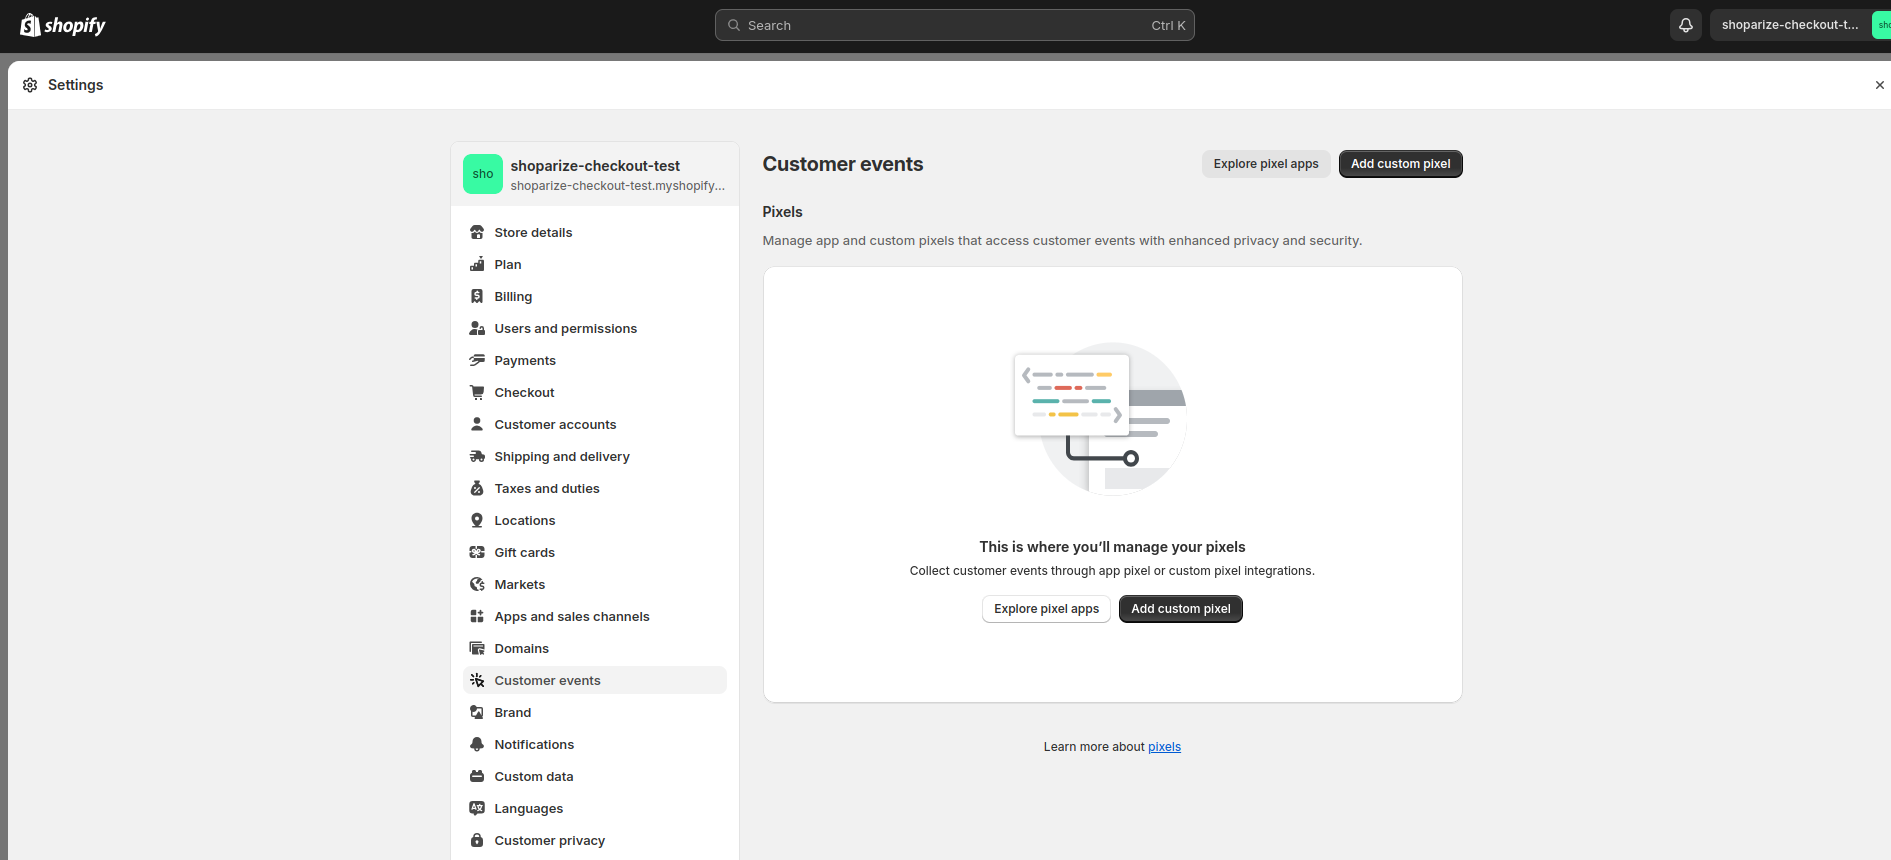
1. To start creating the integration, go to your shop and open Settings > Customer Events:
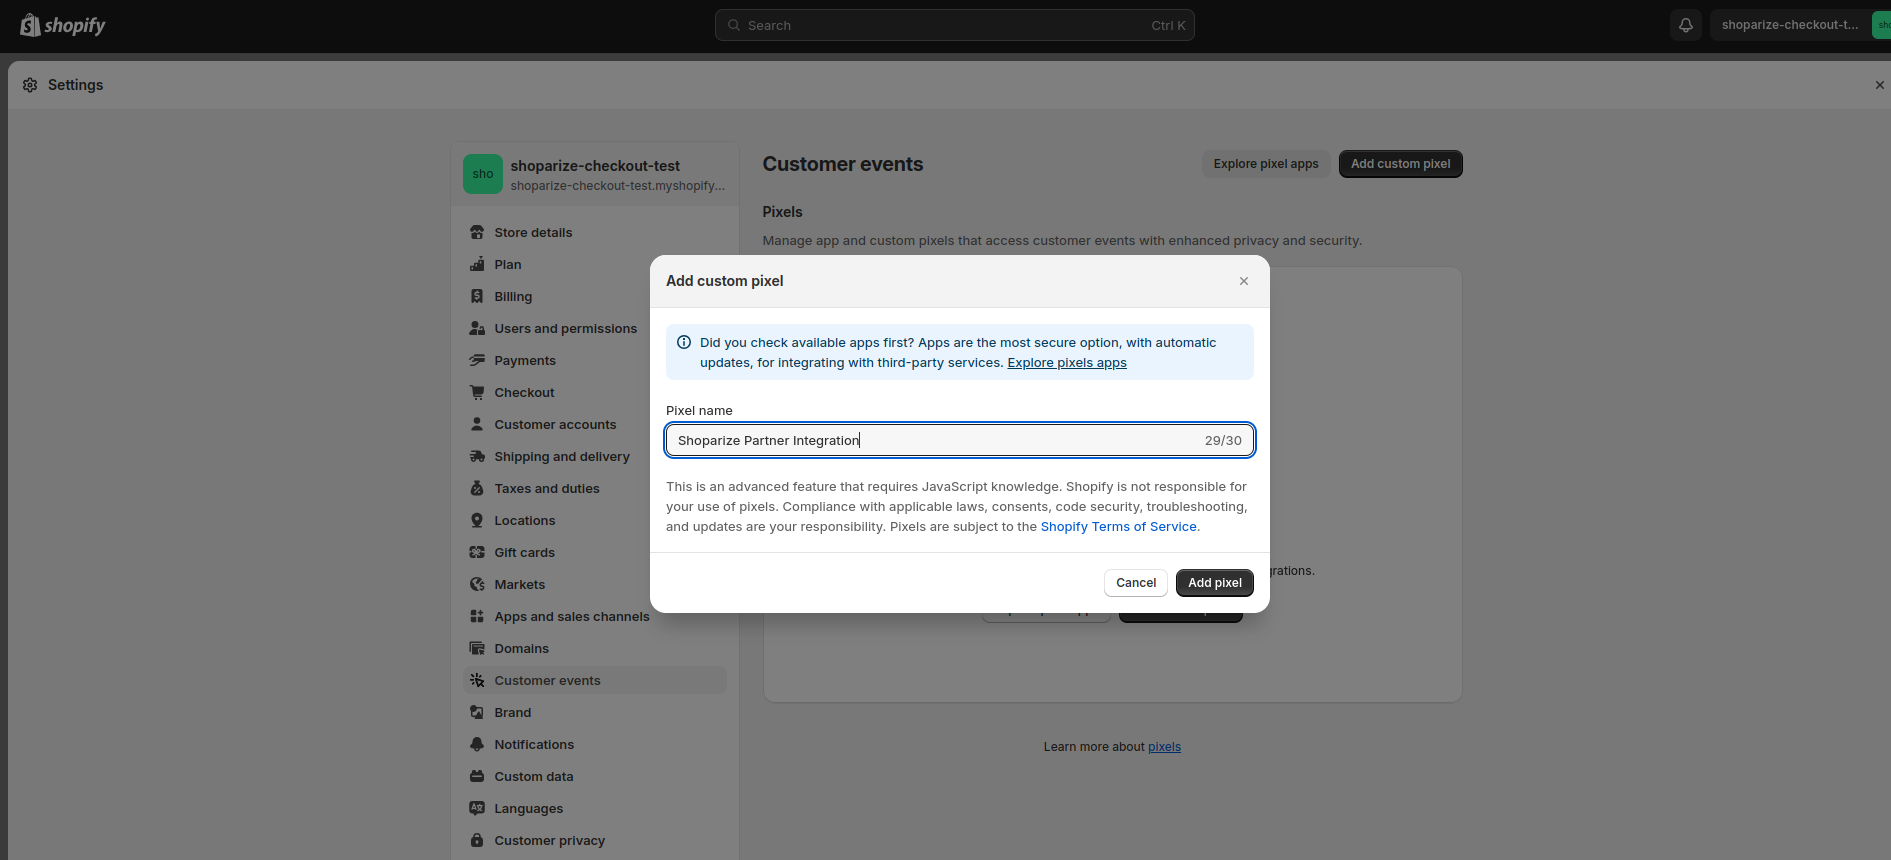
2. Click on the button “Add custom pixel” and fill the name of the new pixel using the name “Shoparize Partner Integration“
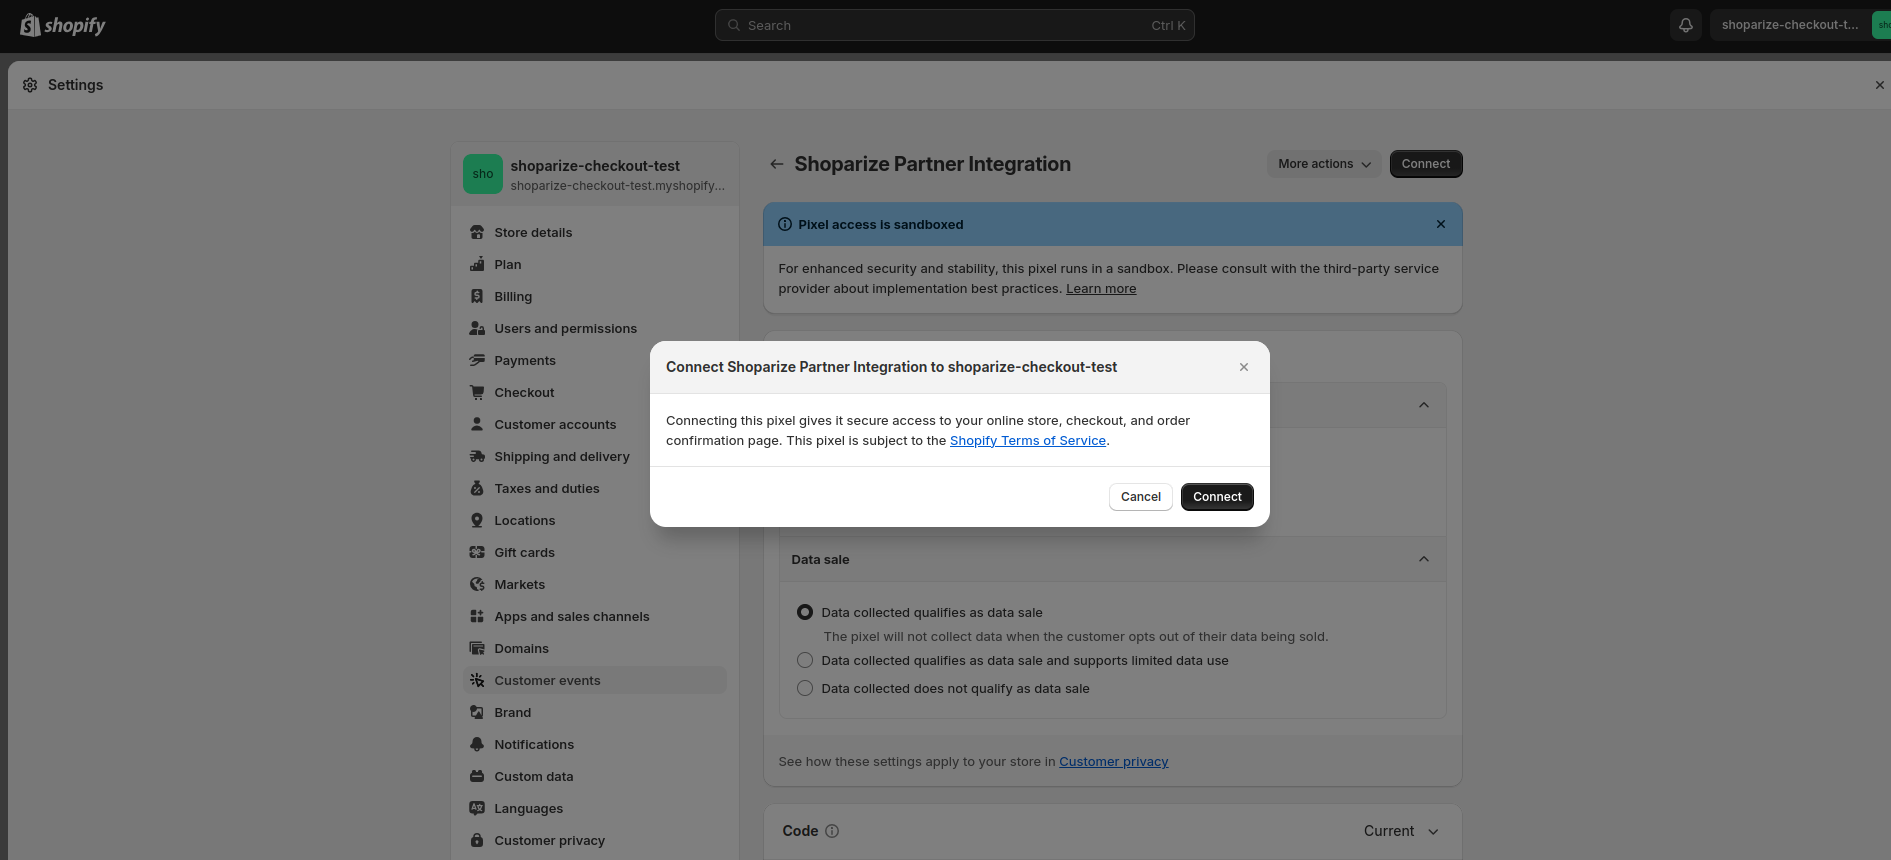
3. Now you can fill all fields as shown in the screenshot or written below:
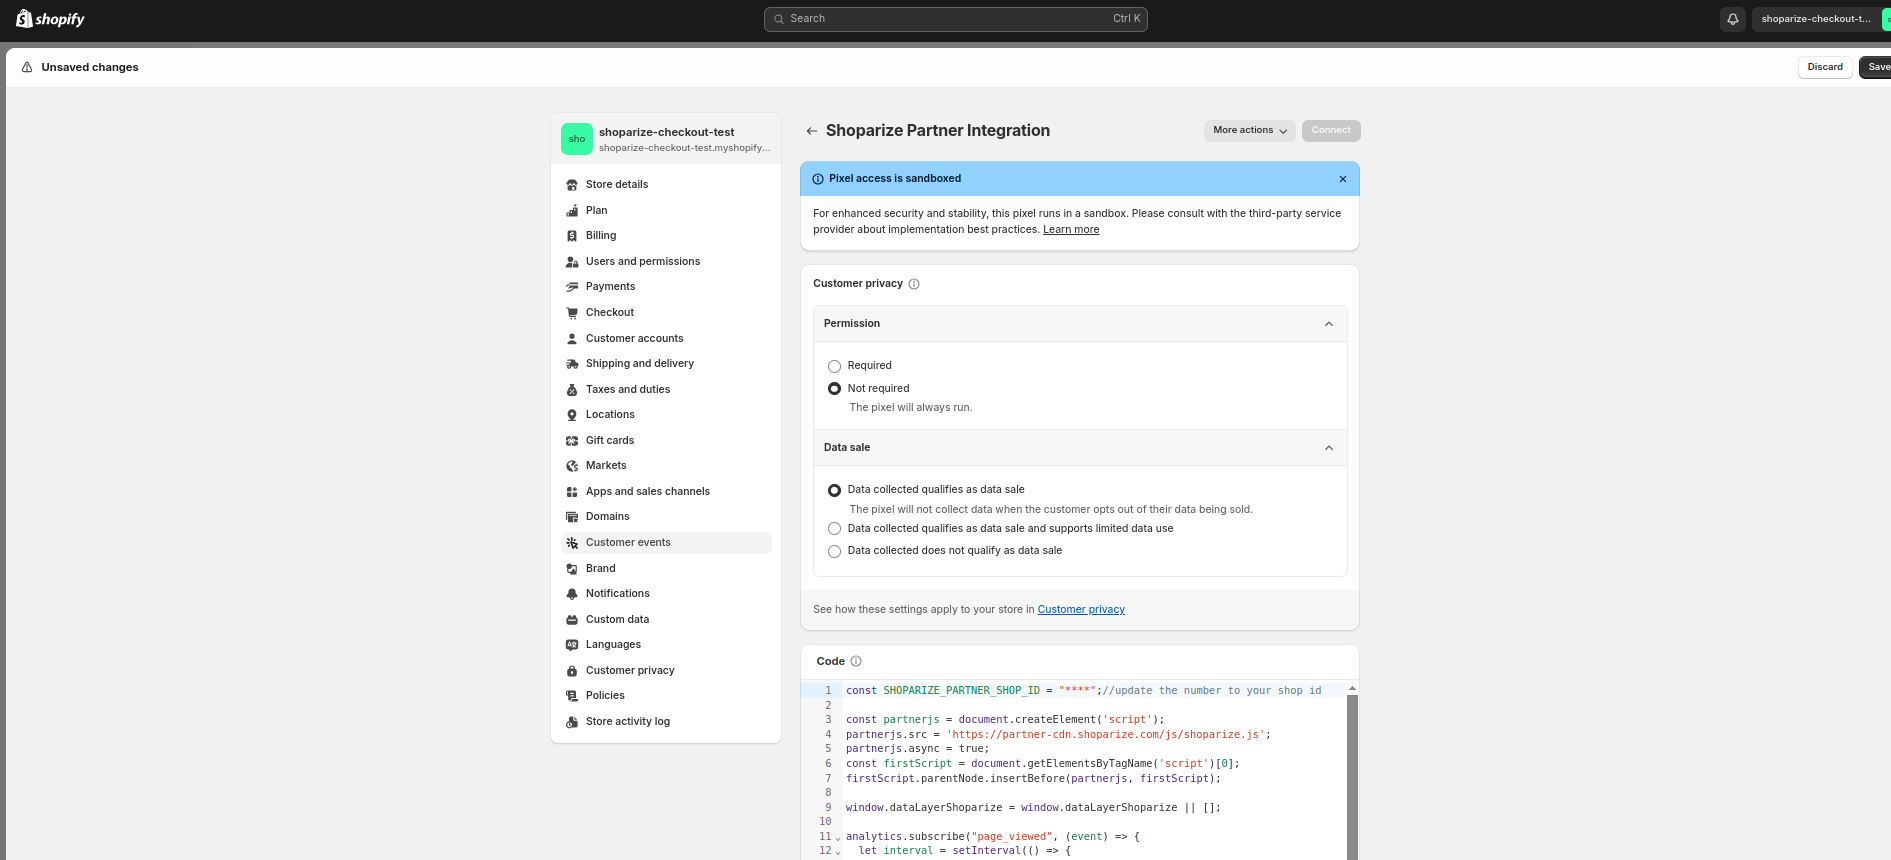
Permission: Not required
Data sales: Data collected qualifies as data sale
Code:
                          let SHOPARIZE_PARTNER_SHOP_ID = ****;//UPDATE THE VALUE TO NUMBER OF YOUR SHOP ID

//do not touch the code bottom
const partnerjs = document.createElement('script');
partnerjs.src = 'https://partner-cdn.shoparize.com/js/shoparize.js';
partnerjs.async = true;
const firstScript = document.getElementsByTagName('script')[0];
firstScript.parentNode.insertBefore(partnerjs, firstScript);

window.dataLayerShoparize = window.dataLayerShoparize || [];

analytics.subscribe("page_viewed", (event) => {
  let interval = setInterval(() => {
    if (typeof window.SHOPARIZE_API != 'undefined') {
      SHOPARIZE_API().init(SHOPARIZE_PARTNER_SHOP_ID);
      clearInterval(interval);
    }
  }, 50);
});

analytics.subscribe("checkout_completed", (event) => {
  let items = [];
  event.data?.checkout?.lineItems.forEach((item) => {
    items.push({
      item_id: item?.id,
      item_name: item?.title,
      currency: event.data?.checkout?.currencyCode,
      price: item?.variant?.price?.amount,
      quantity: item?.quantity
    });
  });

  dataLayerShoparize.push({
    event: "purchase",
    ecommerce: {
      transaction_id: event.data?.checkout?.order?.id,
      value: event.data?.checkout?.totalPrice?.amount,
      tax: event.data?.checkout?.totalTax?.amount,
      shipping: event.data?.checkout?.shippingLine?.price?.amount,
      currency: event.data?.checkout?.currencyCode,
      items: items
    }
  });

  let interval = setInterval(() => {
    if (typeof window.SHOPARIZE_API != 'undefined') {
      SHOPARIZE_API().conv(SHOPARIZE_PARTNER_SHOP_ID);
      clearInterval(interval);
    }
  }, 50);
});
Important: In the Code textarea you must replace the “****” value using your shop ID, for example if you shop ID is 1234, the first line must looks like this:
const SHOPARIZE_PARTNER_SHOP_ID = 1234;//update it to the number of your shop id
If you leave the value without changes or do not set up correctly your shop ID, the integration will not work.
4. Click “save“:
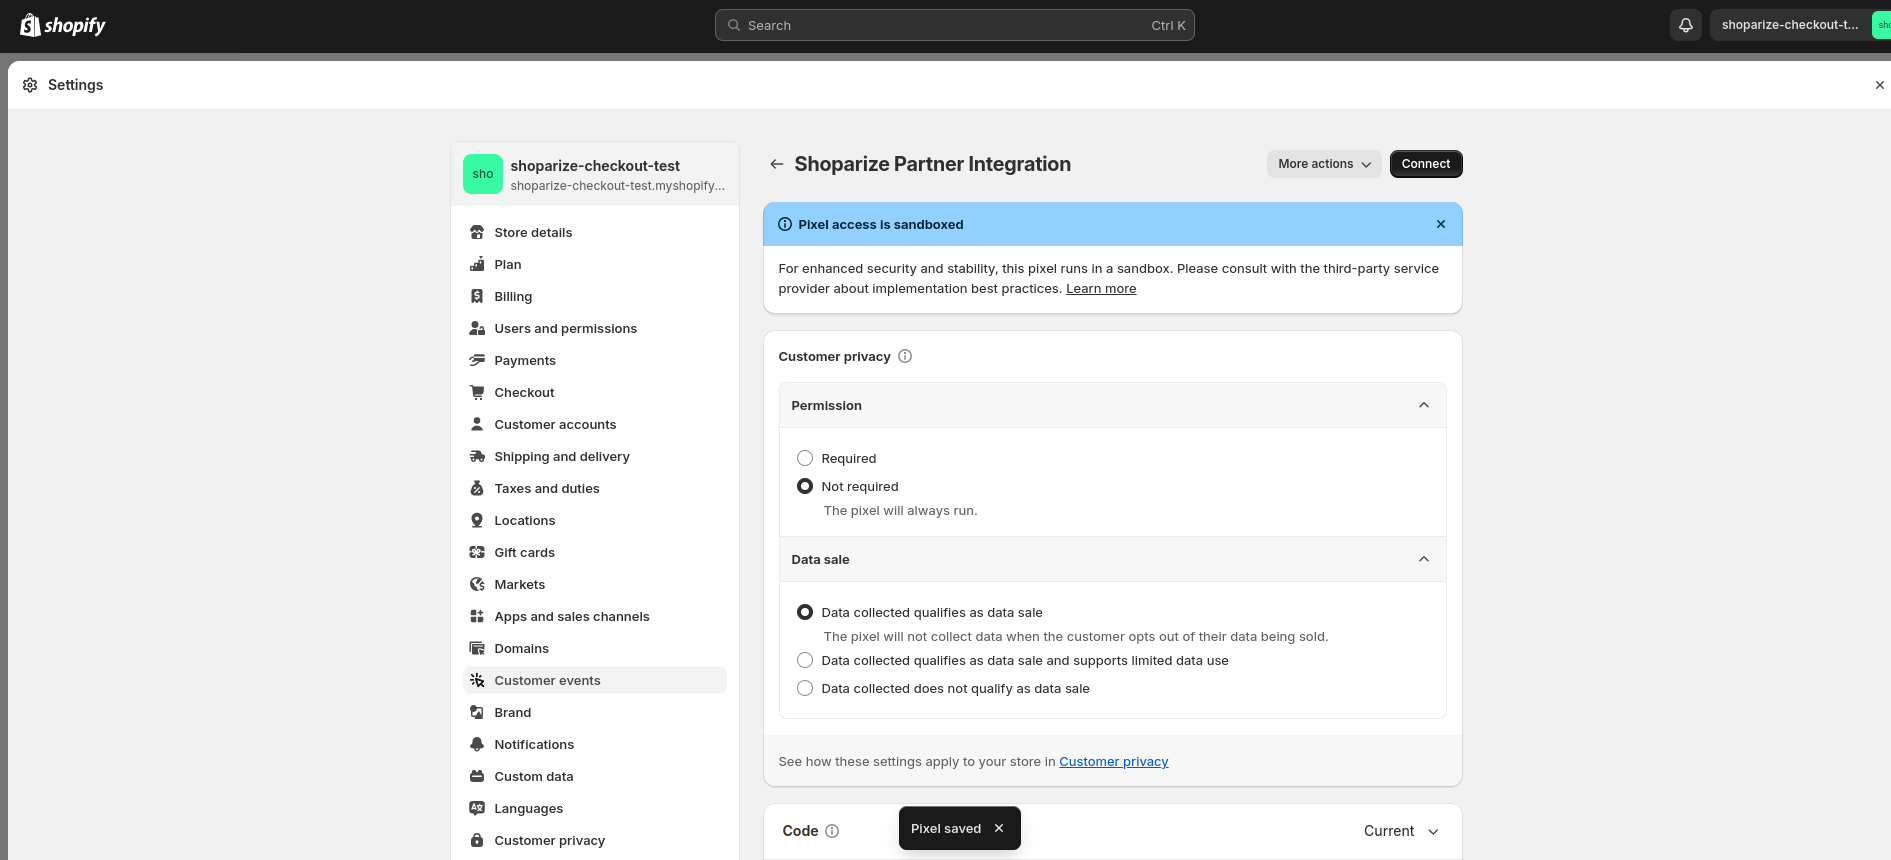
5. Then, click on the “Connect” button (the pixel will not work if you don’t)
Note: Shopify’s Customer Events in the Shopify Admin may not allow domain-specific settings. Use the updated of above snippet for configuration the pixel with domain-specific settings. If you don’t use multiple domains in your store settings just skip this
                          let SHOPARIZE_PARTNER_SHOP_ID = null;

switch (location.host) {
  case 'SHOP_DOMAIN.NAME'://need to change on your domain name
    SHOPARIZE_PARTNER_SHOP_ID = 1234;//need to change on your shop ID
  break;

  case 'SHOP_DOMAIN_2.NAME'://need to change on your domain name
    SHOPARIZE_PARTNER_SHOP_ID = 1235;//need to change on your shop ID
  break;
}

//do not touch the code bottom
Just change the start of code at 3 chapter before comment – //do not touch the code bottom
That’s it! The integration is done. Congrats 🙂
After executing the manual, you should create a test order using a link our Shoparize Partner support team has sent you. Please make sure to send the test order ID to partner@shoparize.com so we can double check if everything has been set up correctly.
